
The first round of Crafting With The Stars is over and the winner this week was Vintage Revivals. Her project was this fabulous lamp:

And I am so excited to share Mandi's tutorial with you.
Ok people, when I saw this lamp a few months back on Anthropologie I knew I was going to have to bust it out.

Apparently, I needed a special occasion. Enter "Crafting With The Stars".
The Anthro version retails for $198.00, the grand total for mine? $31.99 and most of that was for the drill bit.
Any knick knack that you have will work, you can have a crazy awesome lamp for FREE. It's genius I tell you..... GENIUS!! Muah haha ha ha (lightning bolts crashing and me with crazy hair, cause you know that I haven't changed my ponytail for 2 days.)
OK so how many of you knew that this project from "Crafting With The Stars" was mine?

Do you love it? Do you want to make your own completely interchangeable lamp? Well good cause I am going to teach you!
So you need to start by rounding up a bunch of dishes, knick knacks, basically random stuff that YOU LOVE! This is a lamp that you are designing, so make it yours!
FIGURING OUT YOUR LAYOUT
I tried about 87 thousand ways before I knew exactly how I wanted my lamp layout to be. Here are some that didn't fly:


Once you get it figured its time to start drilling!
DRILLING YOUR JUNK
The type of drill bit that you need is one like this:
I

got mine at Homie D's for $18.00 (EXPENSIVE! I almost slapped the guy when he suggested it.....but so worth it) Mine is only the 1/2" bit.
DO NOT BUY ONE LIKE THIS: This is what I originally bought but it wore out after 1 plate.

SO SO SO IMPORTANT!
You MUST use water to keep your drill bit cool while you are drilling. Otherwise it will ruin your bit. For instance I put as much water as the underside of each dish would hold. You can also pour it on as you are drilling if it is on a surface that wont hold any water.
Also, don't put a ton of pressure on the item that you are drilling, let the drill just grind through it. If you put too much pressure when it goes through the other side you most likely will break something....:(
Start with your drill bit as parallel as possible to your surface:

Slowly start drilling while firmly holding the drill in place (cause its going to start to dance like Derek Hough) Once it gets through the hardened glaze it will not move and you can drill at full speed.) It will start to look like this:

Keep drilling and SLOWLY while you are drilling move your drill into a perpendicular position with your surface (the way you would drill into anything normally)

At this point your hole should look like this:

Just keep drilling and move your drill into a normal drilling position. You can kind of start to feel when its getting close to breaking through the other side, it will catch a little and BAM your through. So that I didn't damage the surface that I was drilling on I used a teacup underneath to catch all of the water, and the core that you are drilling out. Also it protects your surface:

And this is where you will end up:

Also you may have notices in the teacup of remains larger bits of cuteness. When you are drilling through the tops of lids (mine were on my Teapot and Sugar Bowl) make sure that you drill from the underside and it will just take most if not all of the handle. If not I bet you could just "sand" it on your concrete or something.
REVAMPING
Sometimes whilst thrifting you find something that has major potential but needs a little love. This is what I did:

I found this Teapot at TJ Maxx for $9.99, Its not bad at all but it needed a little Vintage Revivals Jazz.
I used this vinyl tree branch:

And stuck it on my Teapot. Its not perfect but as long as the edges were sealed I wasn't too concerned.
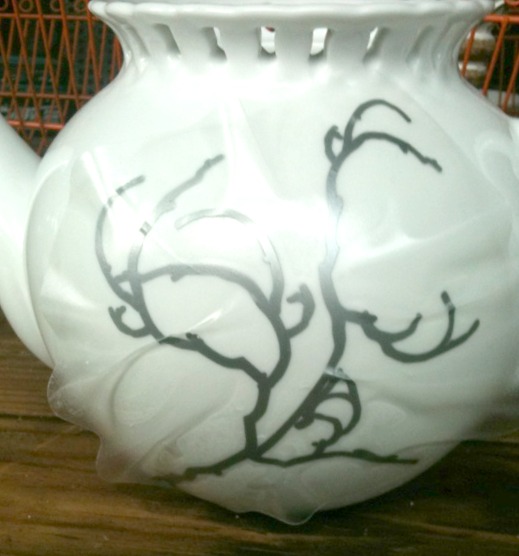

I think that its kind of cute just like that. Then I took it outside and sprayed it with Krylon Classic Gray. Then I took a razor blade and carefully traced it along all of the edges. You have to be super careful while you are peeling it off because paint will come off ceramic pretty easily. I found also that if you start at the tips and peel toward the center it works much more smoothly....

Originally I was going to Gorilla Glue everything together but as I was disassembling a lamp that I just put a new lamp kit on I decided to use its innards.
ASSEMBLING YOUR LAMP
You will need a lamp kit (about $5.99 @ Wally's)
An old lamp that has a weight and rod.
Get your gear:

(The top of the rod is cut off in his picture)
Start by feeding your wiring through your base (bowl):

Next you will feed it through the hole at the bottom of your rod:

Feed it all the way through so that it comes out the top:

Now feed your bowl onto the rod and make sure that its all good underneath:

Now stack your dishes or whatever you are putting on your lamp. You need to make sure that when its all stacked up it is tall enough that it will pull the weights to the top of your base so that it is all held in tightly. (You will have to hold the weights up with your hand until you get your socket screwed on.)
Most light kits come with different size rubber washers. You can use them if you need a filler to hold your weights up. I didn't have to use them on mine but they would be awesome.
Before you put your light socket on make sure you but the harp holder on....not that I did it in the wrong order or anything.....

Assemble your wiring according to the manufacturers instructions.
When you pick up your lamp it should be tight and not move. If it does then you need to add one of the rubber washers that came with your lamp or change out some of your junk to make it taller. Make sense?
Tada! You have just made an AWESOME Anthropologie Knock Off Lamp! Congrats!
Now here is the genius part.
Because you didn't glue anything together EVERYTHING is interchangeable! How cute would it be to have a Halloween themed one with pumpkins, some spell books, a jar of candy, and a little witch hat at the top? Or one that is made out of birds? This is a variation that I made with some things that I had around my house:


p.s. I am addicted to skeleton shades right now.
Here are a few more pictures:


Congrats to Mandi for being this weeks winner and thanks so much for sharing such an amazing project with us!!
8 comments:
yeah! that's the one I voted for! :)
Yay! Thanks Lorie! I will never tire of being featured on your wonderful blog!
Love your guts
mandi
That was my vote. :) So cute.
I voted for Mandi too...I LOVE that lamp---job well done girl!
What a fun project with such beautiful results! I sure admire folks who do stuff like this. Uh, who's Derek Hough?? Somebody on Dancing With the Stars?
I voted for this! Amazing!
this is the best tutorial I've seen for this project-well done!
I LIKE YOURS BETTER THAN THE INSPIRATION ONE...
Post a Comment